
Font Menu in InDesign
I create tons of different types of documents for a variety of clients. I also create digital scrapbooks. For some pages, I use a variety of fonts. I’m always looking for something fun, different and cool. In InDesign, you can filter your fonts by Classification. If I want to find a script font, I can see ALL of the script fonts I have installed, instead of manually looking thru all types of fonts, one at a time.
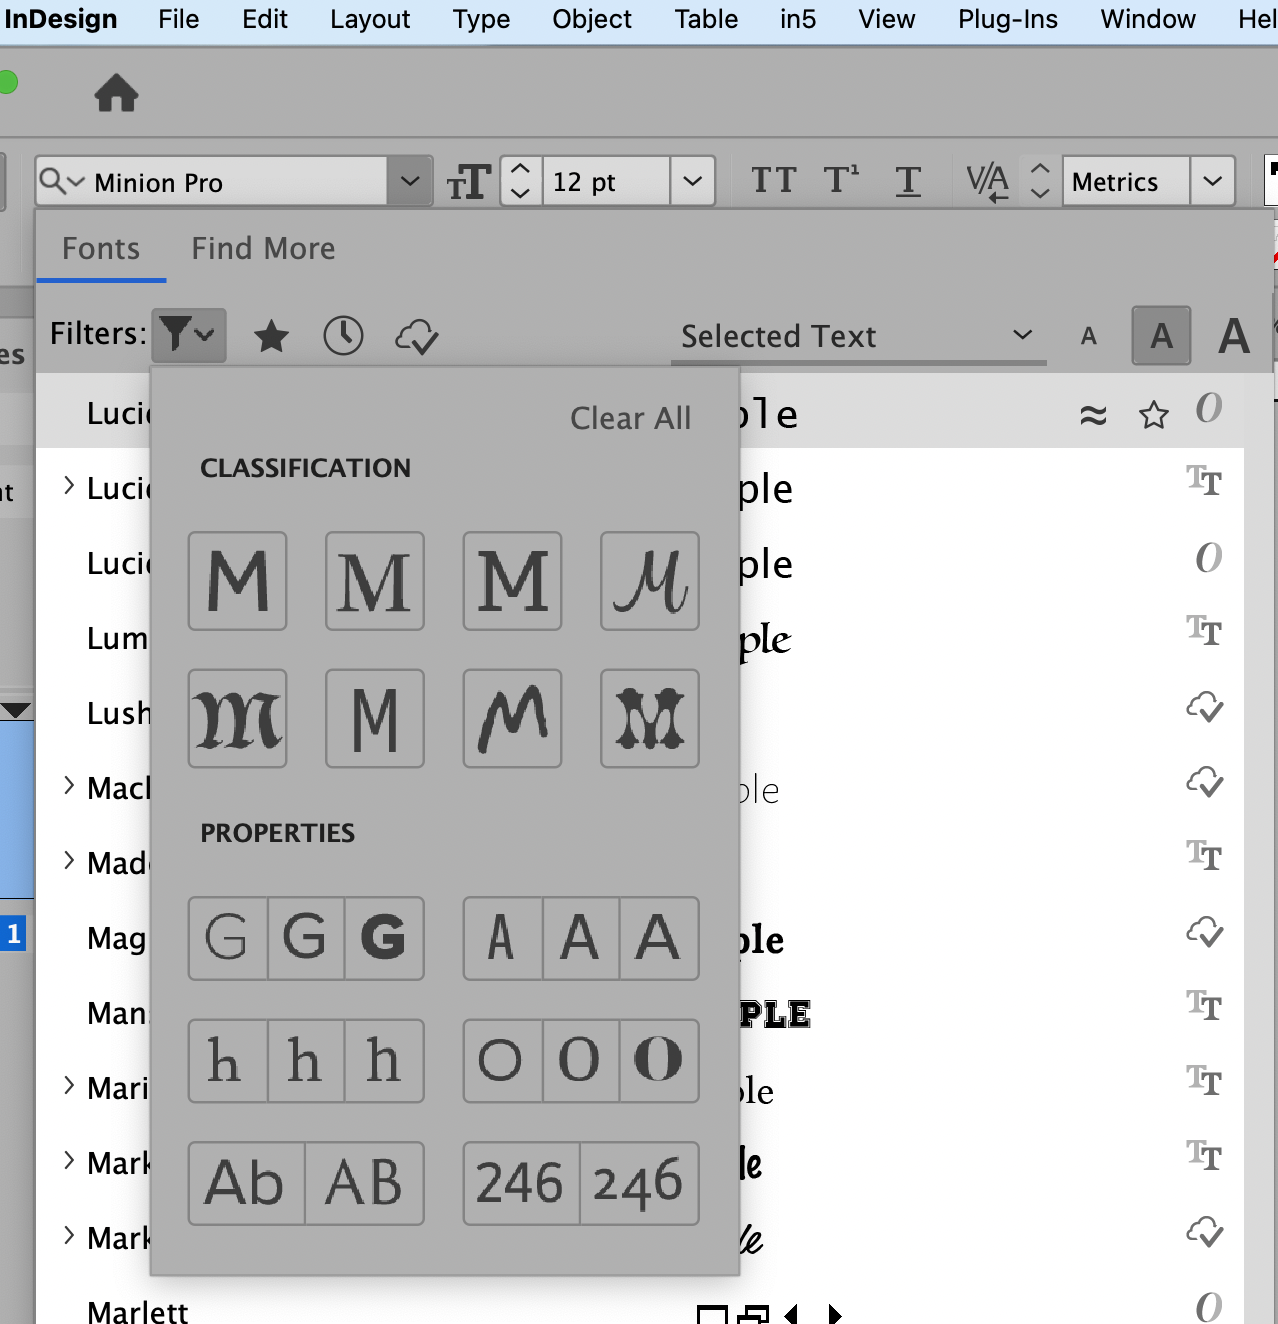
Click the little funnel icon after Filters: to choose a “Classification” such as Serif, Script or Handwritten and “Properties” like thick, condensed, caps or old style numbers. This will show a curated list of fonts installed on your system, that fall into those selected categories. Make sure to hit Clear All to display ALL fonts again.
Another way to display only a few fonts of YOUR CHOOSING, is to click the STAR icon to the right of the font name. This is great if I’m working on a project with only one or two fonts allowed. I can show ONLY those two fonts so I don’t get tempted or frustrated by scrolling through a long list of fonts.
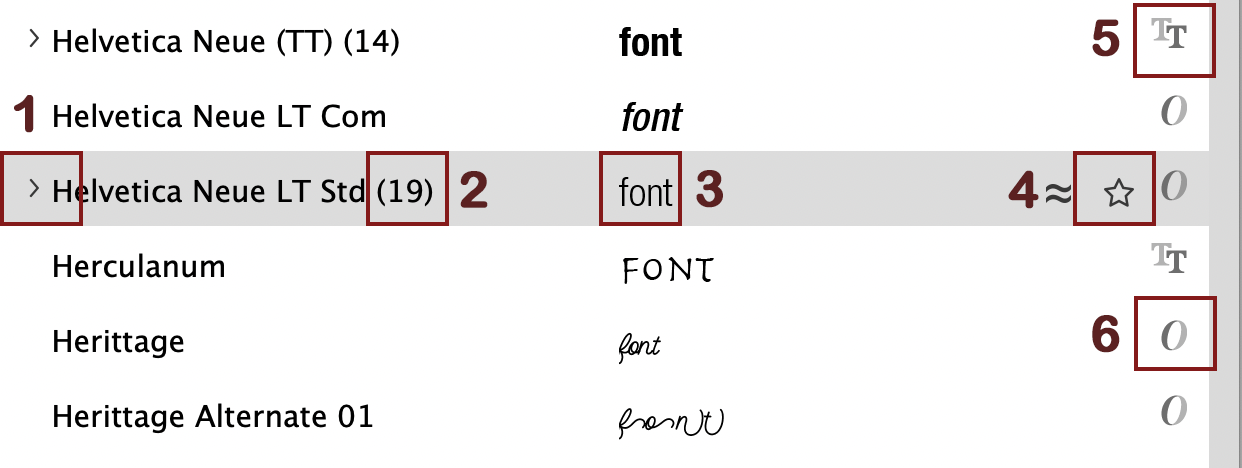
Explanation of the little icons in the Fonts drop down menu.
1 - This arrow indicates that there are more Font Styles under the main Font, such as Bold, condensed or Italic. Click the arrow to reveal all Font Styles
2 - The number in parens indicates how many Font Styles are loaded for the Font
3 - You can choose to display the selected text or the word “Typography” or the entire alphabet, and a few other examples. You’ll choose this from a dropdown at the top of the font list.
4 - The “favorites” star will only show up when your mouse is hovering over the name of a font. Click this star to make it turn dark. Once you have a few fonts with selected/dark stars, you need to filter (click on the star at the top of the font list) to show only the “starred” fonts. This is really handy if you have many fonts installed, and are only using a handful for a project.
5 - Indicates a True Type font
6 - Indicates an Open Type font
Bonus tip: When you have text selected with the type tool, press Command +6 (mac) or CTRL + 6 (win) to highlight the font menu in the Control Panel. Now you can type the name of the font you’re looking for! Hit Return when finished to apply the font, or hit Tab to jump to the next field in the Control Panel.
Note, for the tip to work, you do have to make sure your font is at the top left of the control panel – not the alignment buttons. See the little A and P (paragraph marker icon)? way at the left of the screen shot? Make sure the “A” is active for this shortcut to work.

The Control Panel, with Character Formats first (note the active A on the left)