
InDesign Workspaces and Preferences
Learning InDesign can be daunting. The overwhelming number of buttons, settings and panels can be downright frightening. In this post, I’m going to outline ways to set up InDesign so that it’s efficient and you don’t have to hunt to find frequently used panels or change settings every time you begin to work.
First, let’s talk about what you see when you first launch InDesign.
Modify and Save your InDesign Workspace
If you’re using InDesign, and launch it after a fresh install, you may see that there is no Control Panel at the top of your application window. The InDesign team made the default workspace as clean as possible, but in doing that, they removed some of the intuitive functionality we find in most programs, like Microsoft Word or Powerpoint. Most software users are accustomed to choosing options at the top of the application window. To display the Control Panel, choose Window > Control. But there is a better option, create your own workspace.
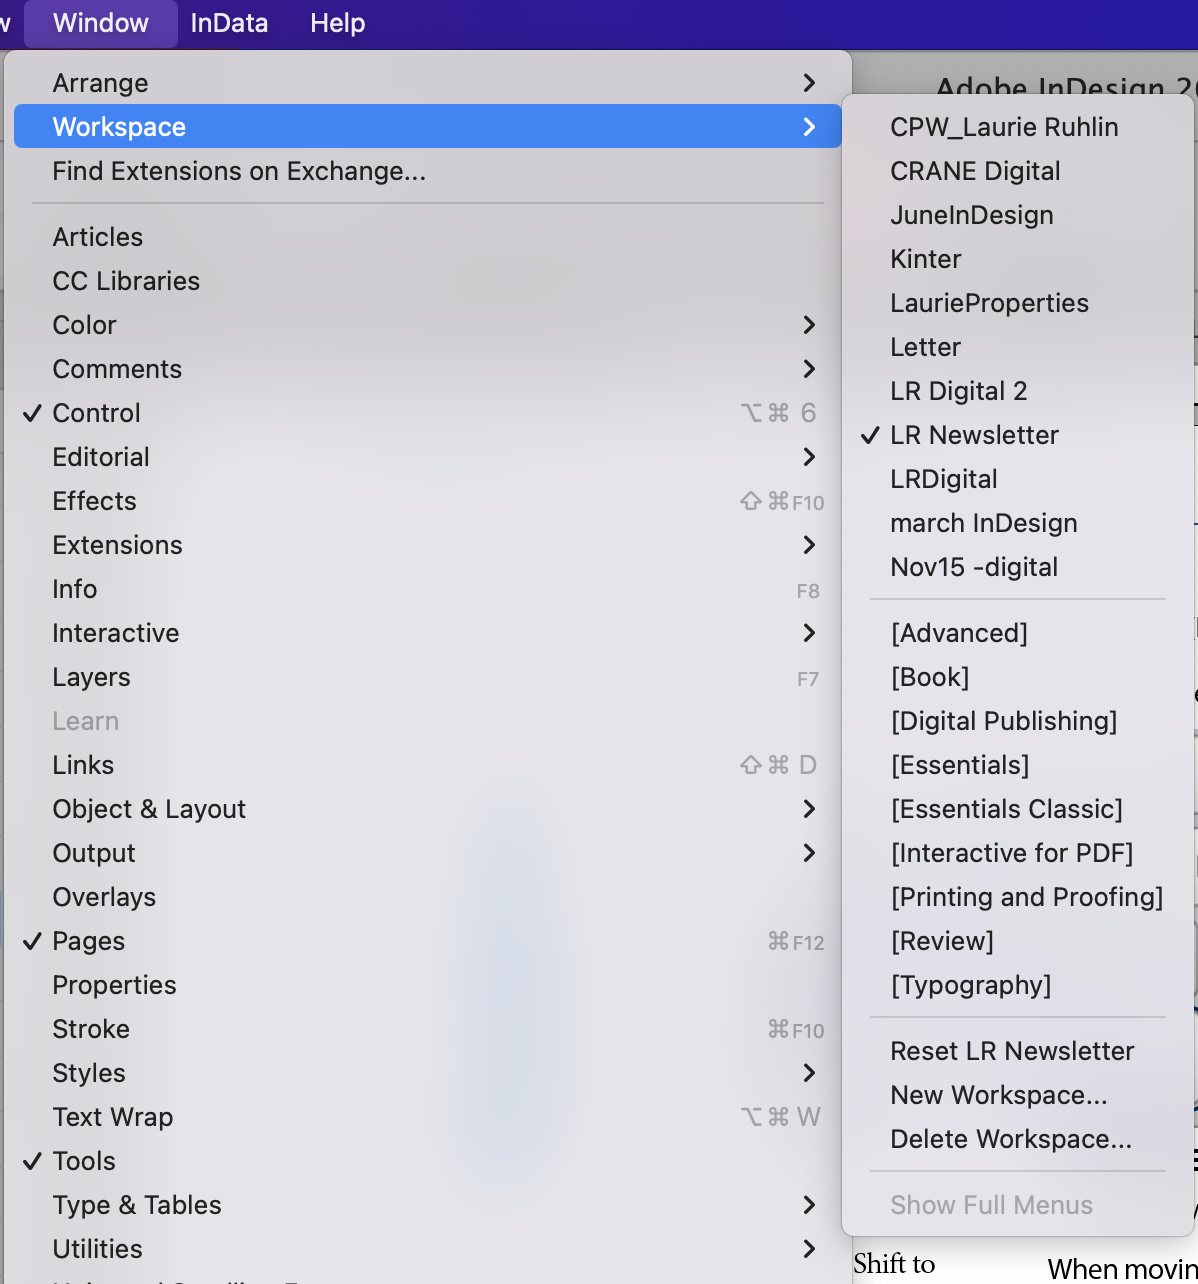
Choose Window > Workspace > Advanced. This will display the Control Panel at the top, as well as add a few useful panels, such as the Paragraph Styles Panel and the Character Styles Panel on the right side of the screen.
I like to customize my workspace by dragging the Pages panel to the left side, just left of the tools. This way I can see and switch between all of the pages and Parent Pages without revealing the Pages panel each time. I also add the Align Panel to the panel list on the right side. Choose Window > Object and Layout > Align. Click and drag the Align tab to the right, under the last panel name. After dragging the Align panel, you’ll be left with the Pathfinder panel, which you probably won’t use very often. Close the panel by clicking on the “x”. You can add any other panels that you use, such as Hyperlinks, Text Wrap etc.
Save a Workspace
Once you have your InDesign workspace arranged in a way that you like to work, it’s important to save it so you can easily clean up the workspace, if you open or close your panels or drag them to different positions.
Make sure all the panels are in the exact locations you like. Make sure they are opened or closed as you want them to be.
Choose Window > Workspace > New Workspace.
Type in a workspace name, click OK.
You should see the workspace name in the top right corner of the InDesign Application with a drop down arrow, where you can also click to choose a different workspace, create a new workspace or reset your workspace.
If you open, move or close panels, you can easily return to your saved workspace by choosing Window > Workspace > Reset “workspace name”.
You can save as many workspaces as you like, one for each type of project you work on. I have one for my digital documents, with the interactive panels, such as hyperlinks, animations, buttons and forms etc. and one for heavy type documents with styles, tables, text wrap and other panels that are useful with typography.
Edit > Preferences (win) or InDesign > Preferences (mac).
Change Units and Increment Preferences
Another frustration to new users or those who have recently upgraded, is that when you create a new InDesign document, the default measurement system is Picas. A Pica is a typographic unit of measure corresponding to approximately 1⁄6 of an inch. When I first learned prepress and worked with QuarkXPress, I was taught to use picas. I still think it is an easier measurement system to use than inches, but most designers tend to use inches in the US and millimeters in Europe/Asia as the standard unit of measurement for documents.
If you’d like to change the default measurement from picas to inches or centimeters for EVERY NEW DOCUMENT CREATED IN INDESIGN, then follow these steps:
Steps to change preferences
Launch InDesign. Make sure you have f. This will change the preferences for all NEW documents from this point on. If you have a document open, it will change the preferences of only the open, active document.
Choose Edit > Preferences (win) or InDesign > Preferences (mac).
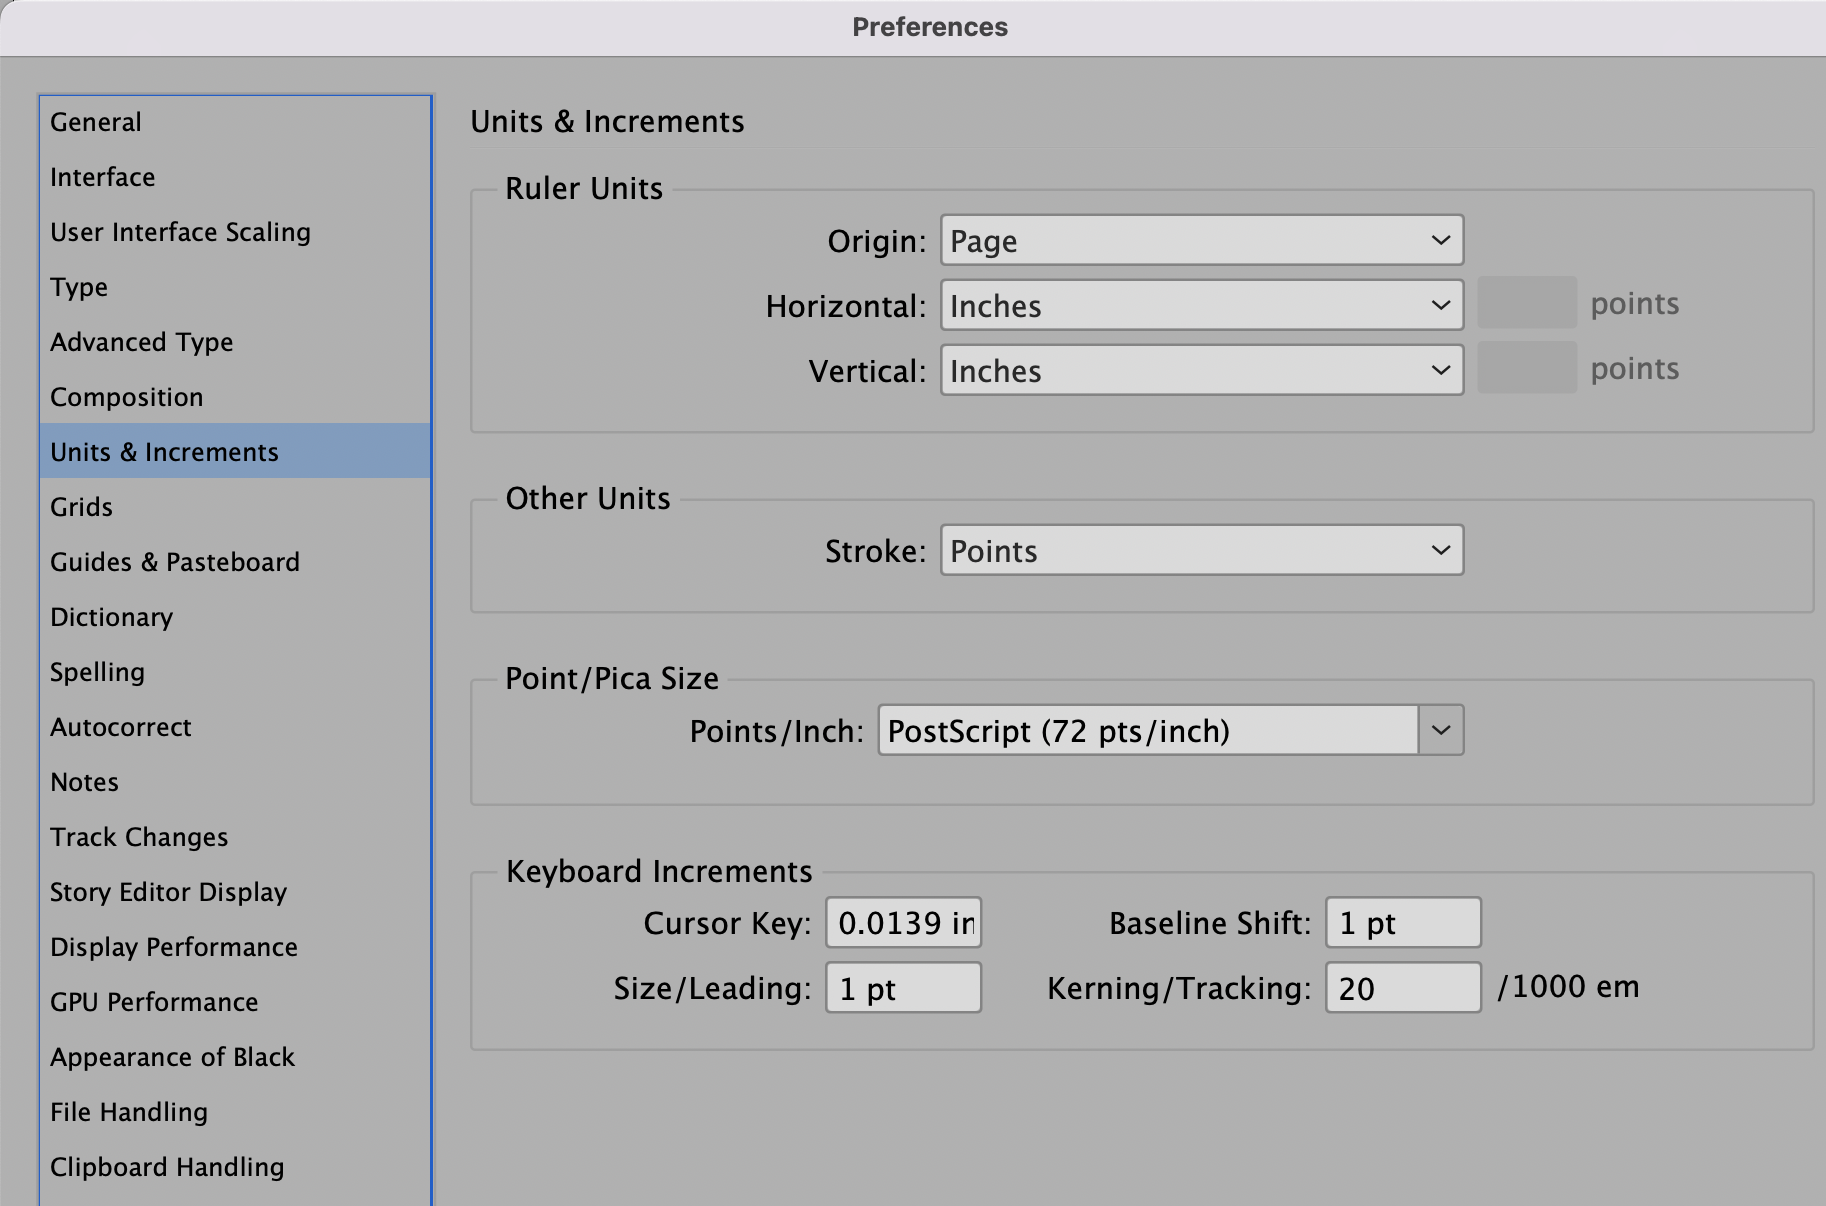
Click on Units & Increments in the list on the left side.
Under the Ruler Units section, choose Inches for both Horizontal and Vertical. Click OK.
Since you made this preferences change with no other documents open, every NEW document from this point forward will use inches as the default measurement. If you open a document created on a different computer or before you made this change, the measurement system will be the one saved with the document.
To change the measurement system of an active document, in addition to using the preferences panel, you can right click on the little square where the horizontal and vertical rulers meet, and choose a different measurement from the dropdown. When you save the document, the measurements will be saved with the document.
Typing in values

Here is an interesting fact about entering in a dimension into a field such as W: (width) or H: (height). If your document is in inches, and you need to type in a width of an object in centimeters, you can type in “3cm” in the field. InDesign will automatically convert cm to inches. If you type in just “3”, InDesign will assume that you mean inches, the default measurement of the document. You can also type in 3+2 in any field and it will display the answer to any arithmetic problem.
Visual Guide to InDesign Preferences
There are other preferences that can be set with no documents open that will apply to all new documents from this point on. Check out this post from InDesignSecrets.com for a Visual Guide to InDesign Preferences. This explains which preferences are document specific and those that are global InDesign specific changes.
I hope you’ve learned a little about setting up InDesign to make it easy for you to work with. I love to begin the day with a clean desk, and I feel that resetting my workspace every morning gives me a clean slate. It resets my panels, so I can use InDesign the way I’ve become accustomed to.
Check out my video on setting up Preferences and Workspaces on YouTube.
